


AR Build: Breaking the "Rules"
- Graham Baates
- Sep 25, 2022
- 9 min read
Updated: Mar 8, 2024
*Some of the external links found on this website are affiliate links. Those links use cookies to generate revenue and fund continuation of this website. By clicking an external link you are consenting to a temporary cookie, by purchasing from that link you are supporting this website. To opt out of cookies do not click external links.

Given the popularity of the AR Pistol Worth Shooting build, it seemed worthwhile to breakdown another semi-controversial build. Tired of off-the-shelf, over-gassed rifles with boring reliability, and wondering just how little energy could be taxed from the round. I set out to build an AR that would become the softest-shooting AR I've ever handled. It's not just about recoil mitigation, it's also about letting the projectile have the most energy it can, i.e. faster and harder hitting than the same ammunition from another rifle.
In the process of this experiment I was held up by a mislabeled buffer spring and had initial challenges getting the gun to run. When I posted a video of that on YouTube viewers missed the tongue-in-cheek tittle, "The Worst Thing You Can Do To Your AR" and began to shred all the aspects of the build that broke the "rules". The irony is that the worst thing you can do to your AR is the internet for advice. While the internet allows us to connect with people around the world instantly and exchange thought, it also permits us to exchange thought with some who perhaps would be better off reading the internet than commenting on it.
After the first 3,000 comments I was able to boil down the misconceptions into seven alleged rules for building an AR and made an article about it for Ballistic Magazine's website. Shockingly that article did nothing to slow the, "you're wrong" comments. I suspect those who spout ignorance in comments are also unlikely to read or do research.
If you would like to try building something similar, here are the principles that inspired this build:
The AR taxes expanding gasses used to propel the round in order to cycle the rifle.
The more gas that is taxed, the more reliable a rifle will be as the action can blast through grime, feeding issues, etc. However, if a rifle is not a "go to war" build, and kept generally clean, why worry about it? Additionally, why build something no different than what can be readily purchased for less?
Part of the minimum amount of gas needed is to overcome the mass of the carrier, buffer, and buffer spring. If those are decreased, the amount of gas needed is also decreased.
Such a build runs the risk of decreased reliability which is likely why we don't see them as factory options. Manufacturers need to know their stuff will run when abused by the consumer.
Does it work? Of course it does, otherwise I wouldn't be advocating such an experiment. Just watch the slow-motion segment the video below it linked to.
Another internet lore point of note: According to the misused ejection pattern guide, this rifle must be over-gassed as the brass is ejecting more forward than to the side. I'll have to address all the misnomers about ejection pattern as an indicator of gassing in another post. That guide has to be one of the most misunderstood and misapplied "rules" about ARs
THE BUILD
Here is the list of components, why they were chosen, and where to find them. Many of these can be substituted, the point of the list is to demonstrate concept. This was not an inexpensive build, I wanted to do something different, something "fancy" and bought parts slowly over the course of several months as I could afford them. Key components to building something truly different are highlighted in red.

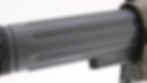
Muzzle Device: Vendetta Precision VP-09 Brake in Titanium. During the 'Merigun build I came to appreciate the advantages of reducing leveraged weight. Though the ounces (or less) saved with a titanium muzzle brake or gas block seem menial, the leverage they have at the end of the rifle magnifies their impact greatly. Shaving an ounce or two off the end of the rifle greatly enhances handling be making the rifle quicker to point. If you're bench-shooting it won't make a difference, but for a rifle meant to be wielded and maneuvered the advantage is undeniable. Titanium muzzle devices do tend to spit a few sparks thanks to a chemical process called ablation. Not enough to bother me, just don't be alarmed by it.
Another option we've used and enjoyed include the titanium flash-hider from V7 Weapon System. This is what Teya went with for her fancy build.


Barrel: 18" .223 Wylde Fluted Stainless Steel, Rifle-Length This choice was one of controversy in the build as the internet seems to believe that an 18" barrel is too short for rifle-length gas. The thought is that there's not enough dwell time (time when the system is pressurized, bullet still in the barrel, while gas is diverted into the gas system). With this barrel the system is pressurized for about 2" of bullet travel, assuming a bullet velocity of 3,200 fps that means the gas system only has 0.00005 seconds to do its job once gas reaches the port and before the bullet leaves the barrel and depressurizes the entire system. That's not a lot of time, but it is enough time with this build. 18" was chosen as the shortest commonly-available barrel length that could still have a rifle-length gas system. Fluted to help reduce weight for a barrel that handles more like a 16".

Gas Block: Patriot Ordnance Factory Dictator. If gas is already going to be low, why use and adjustable gas block? I wanted to be able to tune the system as low as possible. When this build was complete I discovered that with this gas block, one click makes the difference between the rifle running on 5.56 ammo (max pressure of 62,366psi) only, or being able to also run on .223 ammunition (max pressure of 55,000psi).
The Dictator is a great gas block and includes a pre-mounted gas tube. 9 settings makes for lots of adjustability to control your rifle, however it is tall and long. The option was to either get a handguard with a larger interior diameter or a shorter handguard to keep the build slim.
Other adjustable gas blocks will also do, just do some research first. Some of them bleed off gas instead of blocking it, some are more prone to carbon lock than others. We recently began experimenting with the Strike Industries CAGB which costs considerably less but requires no tools to adjust. Very handy if you plan on donning and doffing a suppressor frequently.
Handguard: F-1 Firearms H7M - AR-15 Ultra Lite Handguard. This is of course a completely personal choice. For me there were both functional and aesthetic goals. With the height of the Patriot Ordnance Factory Dictator gas block I'd need either a fat handguard to go over it, or a short one to end just short of it. My other desire in a build was to have the lines of the handguard complement the lines of the upper receiver. <-- Why is that so hard to do? Even "factory" guns often have mismatched lines. So frustrating. Measure twice, order once.
Some "lightweight" handguard can be prone to flexing. That's only a concern if you plan on mounting a front sight or laser. Since I didn't plan on either I didn't care. This handguard seems to be plenty strong.

Receivers: F-1 Firearms UDR-15 Style 1 .Again a totally personal preference. We happened upon a "matched set" (that turned out to not be matched) during a Black Friday sale. A set priced below what normally just one half would cost. I couldn't resist and the "fancy" receivers are what inspired a "fancy" build. Ironically the aesthetics were perhaps one of the longest sources of internet hate as many ignorantly thought that the upper receiver was venting too much gas for the gun to run. That's not how an AR works.
In hindsight I appreciate the aesthetics of the receivers, and how clean they remain (dirty gas has slim chance at remaining in them), but they were not the easiest to work with. Some measurements felts to be on the tight side of milspec. That promotes accuracy and precision, but also meant that parts from other companies (barrel extension, trigger, trigger pins, pivot pins, etc) needed more convincing than usual to fit. I had to have the upper done by a smith as I wasn't willing to beat on the barrel hard enough to fit it into the upper. An additional drawback to this receiver set was that the buffer retaining pin is threaded in using a tiny allen key. I didn't want to mess with that on a build that I suspected would require buffer adjustment so I simply didn't install it.


Bolt Carrier Group: DSA AR15 Enhanced Low Mass Aluminum Sand Cut Complete Bolt Carrier. Part of reducing how much energy needed to cycle the gun is reducing the weight that has to move. This BCG is LIGHT! 0.33lbs compared to a standard steel carrier weight of 0.72lbs. I do fear that over time the steel cam pin will wear away the aluminum journal. My build wasn't meant to be a super-high round count build, if yours is you may want to try a steel or other lightweight carrier. No problems so far, but we've maybe only got 1,000 rounds through the rifle at the time this was written.

Trigger: Rise Armament Patriot Trigger, now RMT Nomad. The build began life with the Rise Armament Patriot trigger because I wanted to go fast, like Rise Armament's triggers, and as a veteran appreciate the cause behind the Patriot Trigger. I've since swapped to the RMT Nomad as it seemed like the right rifle for an unconventional trigger. Both are great, this is another spot where it's up to personal preference and intended application.
Rise Armament Patriot Trigger

Buffer: Odin Works Adjustable Buffer AR15 Lite. Another place to reduce total mass in the system. I went with an adjustable lightweight buffer in case I needed to tune. In the end I'm running the buffer empty. I suppose if I wanted to add weight and decelerate the carrier I could compensate by adjusting the gas. Depending on how your alternative build goes you may not need to go to such lengths, but with the money invested in this build I decided to err on the side of more adjustability than possibly needed.
Buffer Tube: Primary Weapons Systems Enhanced Buffer Tube. Also optional, but this is one product that once I had tried I couldn't go back. Primary Weapons Systems extended the lip of the tube beyond the buffer retaining pin to provide support for the carrier and reduce carrier tilt. The result is a smother-cycling gun. PWS's brilliant ratcheting castle nut and end plate are included as well. Easier to install and better-performing than a standard buffer tube, end plate, and castle nut. Well worth the extra cost in my opinion.

Stock: Luth-AR MBA-4 A personal choice, but I liked the aesthetic of the MBA-4 and the anti-rattle tensioner is a nice touch. Shaped like a stock meant for the bench, but light enough to also be a race-gun stock. As I wasn't entirely sure how I'd end up using the rifle, why not?
Spring: A reduced-power (-20%) spring was the final ingredient I needed to get the gun running. The original spring seemed stiffer than a typical carbine spring, and I suspect it had been mislabeled. Not wanting to order another spring just to have another issue I opted to go with a 20% lower-powered spring. With the adjustable gas block I figured I'd be safe and it turned out I was right.
With That list I was able to build an incredibly soft-shooting fun rifle. I need to chronograph it against another 18" to see if reducing the amount of gas used has increased velocity, but I don't have another 18" gun to fairly compare it against. Regardless, it was a fun project and never meant to be shown to the world, but the way the first video took off I felt the need to list it all out. Have you experimented with building outside of the "rules"? If so tell us what you did and how it turned out.